
LINE Bot MCP Server
line/line-bot-mcp-server
Integração de IA com LINE Messaging API via Model Context Protocol
Ver no GitHubServidor MCP que integra a LINE Messaging API para conectar agentes de IA a contas LINE Official. Permite enviar mensagens de texto e flex, gerenciar menus avançados e acessar dados de usuários e quotas através de ferramentas MCP padronizadas.
Instalação
npx convez-ai line/line-bot-mcp-server1 comando no terminal: detecta o formato do repositório (marketplace ou plugin avulso) e instala via Claude Code. Requer Node 18+ e o Claude Code instalado.
Métricas
Casos de uso
- Criar bots de atendimento ao cliente na plataforma LINE
- Automatizar campanhas de broadcast para seguidores LINE
- Consultar perfis e quotas de mensagens programaticamente
- Construir interfaces ricas com flex messages customizadas
Veredito

Implementação robusta e bem documentada para integração com LINE. Ideal para quem precisa conectar agentes Claude com a plataforma LINE de forma estruturada através de MCP.
README
A tradução para o português deste README ainda está na fila.
LINE Bot MCP Server

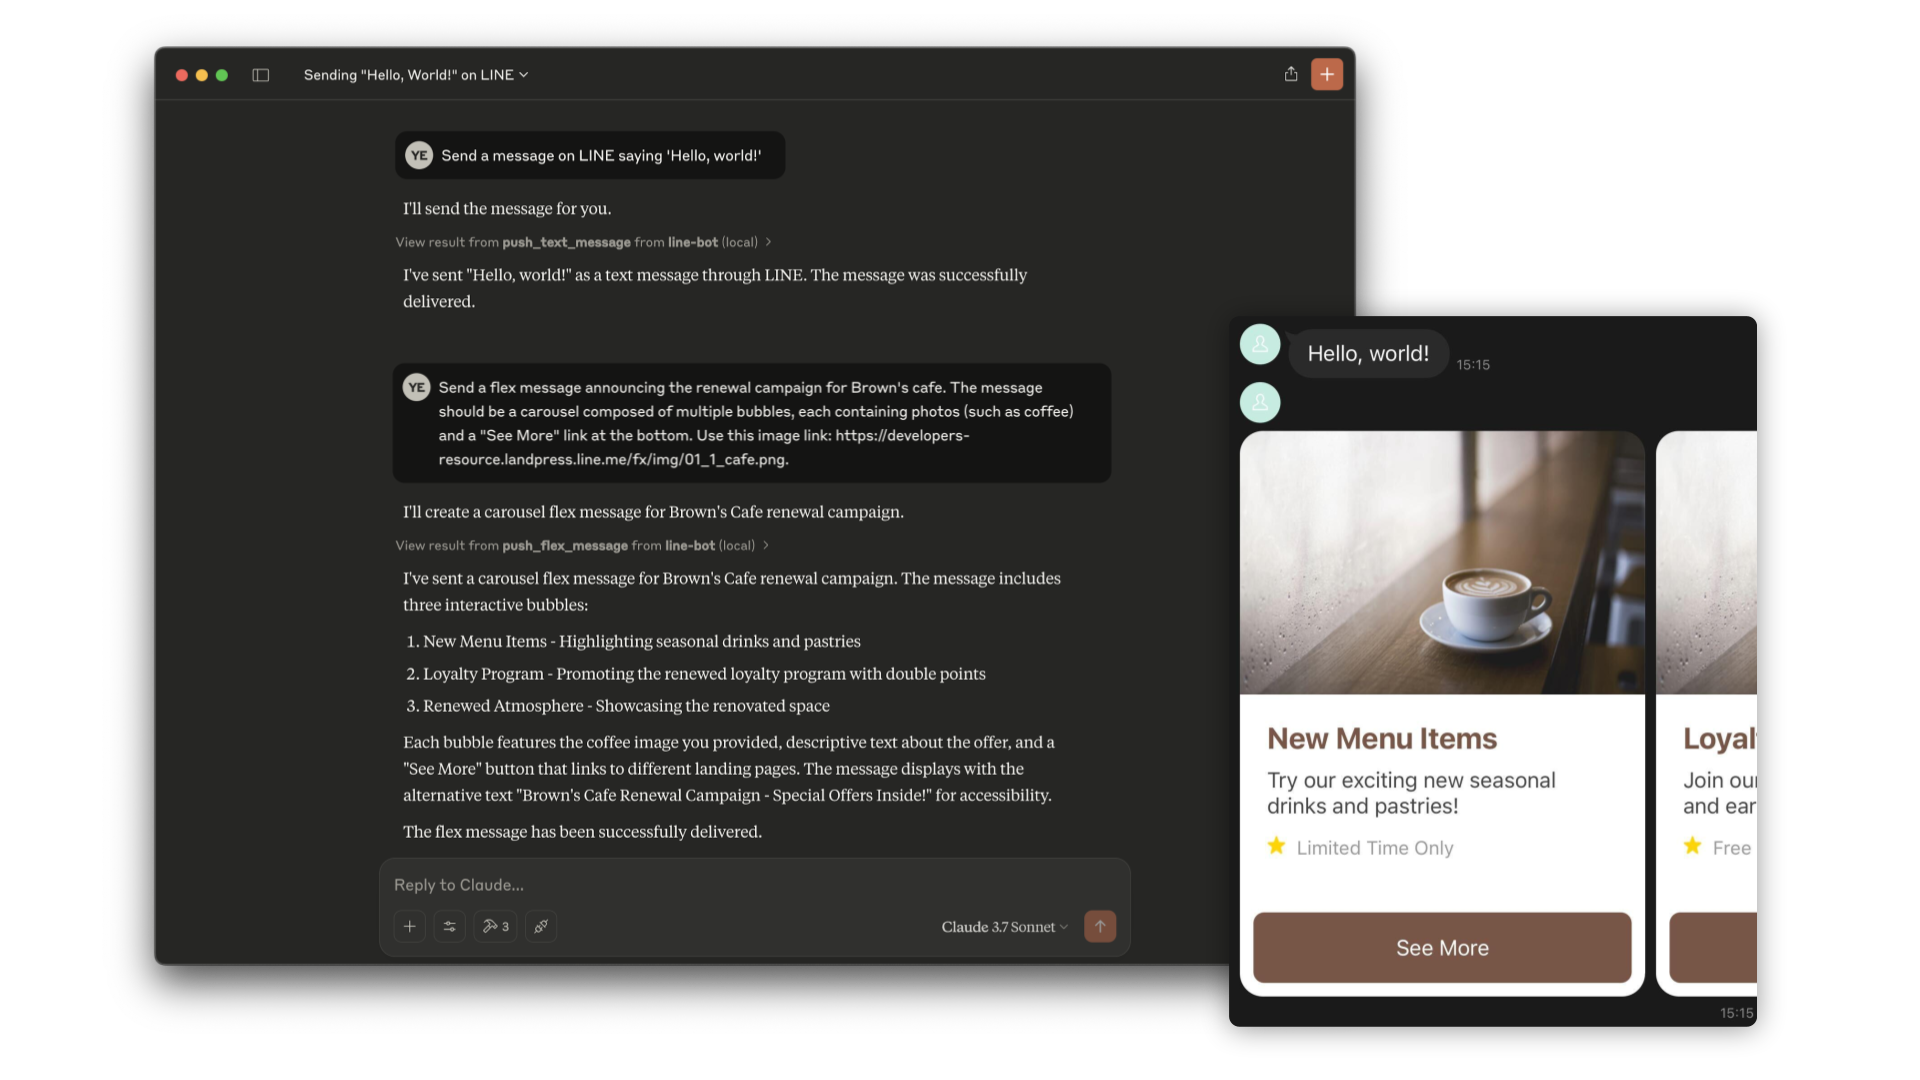
Model Context Protocol (MCP) server implementation that integrates the LINE Messaging API to connect an AI Agent to the LINE Official Account.
[!NOTE] This repository is provided as a preview version. While we offer it for experimental purposes, please be aware that it may not include complete functionality or comprehensive support.
Tools
-
push_text_message
- Push a simple text message to a user via LINE.
- Inputs:
userId(string?): The user ID to receive a message. Defaults to DESTINATION_USER_ID. EitheruserIdorDESTINATION_USER_IDmust be set.message.text(string): The plain text content to send to the user.
-
push_flex_message
- Push a highly customizable flex message to a user via LINE.
- Inputs:
userId(string?): The user ID to receive a message. Defaults to DESTINATION_USER_ID. EitheruserIdorDESTINATION_USER_IDmust be set.message.altText(string): Alternative text shown when flex message cannot be displayed.message.contents(any): The contents of the flex message. This is a JSON object that defines the layout and components of the message.message.contents.type(enum): Type of the container. 'bubble' for single container, 'carousel' for multiple swipeable bubbles.
-
broadcast_text_message
- Broadcast a simple text message via LINE to all users who have followed your LINE Official Account.
- Inputs:
message.text(string): The plain text content to send to the users.
-
broadcast_flex_message
- Broadcast a highly customizable flex message via LINE to all users who have added your LINE Official Account.
- Inputs:
message.altText(string): Alternative text shown when flex message cannot be displayed.message.contents(any): The contents of the flex message. This is a JSON object that defines the layout and components of the message.message.contents.type(enum): Type of the container. 'bubble' for single container, 'carousel' for multiple swipeable bubbles.
-
get_profile
- Get detailed profile information of a LINE user including display name, profile picture URL, status message and language.
- Inputs:
userId(string?): The ID of the user whose profile you want to retrieve. Defaults to DESTINATION_USER_ID.
-
get_message_quota
- Get the message quota and consumption of the LINE Official Account. This shows the monthly message limit and current usage.
- Inputs:
- None
-
get_rich_menu_list
- Get the list of rich menus associated with your LINE Official Account.
- Inputs:
- None
-
delete_rich_menu
- Delete a rich menu from your LINE Official Account.
- Inputs:
richMenuId(string): The ID of the rich menu to delete.
-
set_rich_menu_default
- Set a rich menu as the default rich menu.
- Inputs:
richMenuId(string): The ID of the rich menu to set as default.
-
cancel_rich_menu_default
- Cancel the default rich menu.
- Inputs:
- None
-
create_rich_menu
- Create a rich menu based on the given actions. Generate and upload an image. Set as default.
- Inputs:
chatBarText(string): Text displayed in chat bar, also used as rich menu name.actions(array): The actions of the rich menu. You can specify minimum 1 to maximum 6 actions. Each action can be one of the following types:postback: For sending a postback actionmessage: For sending a text messageuri: For opening a URLdatetimepicker: For opening a date/time pickercamera: For opening the cameracameraRoll: For opening the camera rolllocation: For sending the current locationrichmenuswitch: For switching to another rich menuclipboard: For copying text to clipboard
-
get_follower_ids
- Get a list of user IDs of users who have added the LINE Official Account as a friend. This allows you to obtain user IDs for sending messages without manually preparing them.
- Inputs:
start(string?): Continuation token to get the next array of user IDs. Returned in thenextproperty of a previous response.limit(number?): The maximum number of user IDs to retrieve in a single request.
Installation (Using npx)
requirements:
- Node.js v22 or later
Step 1: Create LINE Official Account
This MCP server utilizes a LINE Official Account. If you do not have one, please create it by following this instructions.
If you have a LINE Official Account, enable the Messaging API for your LINE Official Account by following this instructions.
Step 2: Configure AI Agent
Please add the following configuration for an AI Agent like Claude Desktop or Cline.
Set the environment variables or arguments as follows:
CHANNEL_ACCESS_TOKEN: (required) Channel Access Token. You can confirm this by following this instructions.DESTINATION_USER_ID: (optional) The default user ID of the recipient. If the Tool's input does not includeuserId,DESTINATION_USER_IDis required. You can confirm this by following this instructions.
{
  "mcpServers": {
    "line-bot": {
      "command": "npx",
      "args": [
        "@line/line-bot-mcp-server"
      ],
      "env": {
        "NPM_CONFIG_IGNORE_SCRIPTS": "true",
        "CHANNEL_ACCESS_TOKEN" : "FILL_HERE",
        "DESTINATION_USER_ID" : "FILL_HERE"
      }
    }
  }
}
Installation (Using Docker)
Step 1: Create LINE Official Account
This MCP server utilizes a LINE Official Account. If you do not have one, please create it by following this instructions.
If you have a LINE Official Account, enable the Messaging API for your LINE Official Account by following this instructions.
Step 2: Build line-bot-mcp-server image
Clone this repository:
git clone git@github.com:line/line-bot-mcp-server.git
Build the Docker image:
docker build -t line/line-bot-mcp-server .
Step 3: Configure AI Agent
Please add the following configuration for an AI Agent like Claude Desktop or Cline.
Set the environment variables or arguments as follows:
mcpServers.args: (required) The path toline-bot-mcp-server.CHANNEL_ACCESS_TOKEN: (required) Channel Access Token. You can confirm this by following this instructions.DESTINATION_USER_ID: (optional) The default user ID of the recipient. If the Tool's input does not includeuserId,DESTINATION_USER_IDis required. You can confirm this by following this instructions.
{
  "mcpServers": {
    "line-bot": {
      "command": "docker",
      "args": [
        "run",
        "-i",
        "--rm",
        "-e",
        "CHANNEL_ACCESS_TOKEN",
        "-e",
        "DESTINATION_USER_ID",
        "line/line-bot-mcp-server"
      ],
      "env": {
        "CHANNEL_ACCESS_TOKEN" : "FILL_HERE",
        "DESTINATION_USER_ID" : "FILL_HERE"
      }
    }
  }
}
Local Development with Inspector
You can use the MCP Inspector to test and debug the server locally.
Prerequisites
- Clone the repository:
git clone git@github.com:line/line-bot-mcp-server.git
cd line-bot-mcp-server
- Install dependencies:
npm install
- Build the project:
npm run build
Run the Inspector
After building the project, you can start the MCP Inspector:
npx @modelcontextprotocol/inspector node dist/index.js \
  -e CHANNEL_ACCESS_TOKEN="YOUR_CHANNEL_ACCESS_TOKEN" \
  -e DESTINATION_USER_ID="YOUR_DESTINATION_USER_ID"
This will start the MCP Inspector interface where you can interact with the LINE Bot MCP Server tools and test their functionality.
Versioning
This project respects semantic versioning
Contributing
Please check CONTRIBUTING before making a contribution.