
QGIS MCP
jjsantos01/qgis_mcp
Controle QGIS através do Claude com Model Context Protocol
Ver no GitHubServidor MCP que integra QGIS Desktop com Claude AI, permitindo que o modelo de linguagem controle e manipule projetos GIS diretamente. Suporta criação de projetos, manipulação de camadas, execução de algoritmos de processamento e execução de código Python dentro do QGIS.
Instalação
npx convez-ai jjsantos01/qgis_mcp1 comando no terminal: detecta o formato do repositório (marketplace ou plugin avulso) e instala via Claude Code. Requer Node 18+ e o Claude Code instalado.
Métricas
Casos de uso
- Automação de fluxos de trabalho em projetos geográficos
- Processamento de dados geoespaciais com assistência de IA
- Geração de scripts de análise geográfica através de prompts
Veredito

Integração técnica robusta que estende o QGIS com capacidades de IA conversacional. Requer conhecimento prévio de QGIS e está em estágio de desenvolvimento ativo, com potencial significativo para automação de análises geoespaciais.
README
A tradução para o português deste README ainda está na fila.
QGISMCP - QGIS Model Context Protocol Integration
QGISMCP connects QGIS to Claude AI through the Model Context Protocol (MCP), allowing Claude to directly interact with and control QGIS. This integration enables prompt assisted project creation, layer loading, code execution and more.
This project is strongly based on the BlenderMCP project by Siddharth Ahuja
Features
- Two-way communication: Connect Claude AI to QGIS through a socket-based server.
- Project manipulation: Create, load and save projects in QGIS.
- Layer manipulation: Add and remove vector or raster layers to a project.
- Execute processing: Execute processing algorithms (Processing Toolbox).
- Code execution: Run arbitrary Python code in QGIS from Claude. Very powerful, but also be very cautious using this tool.
Components
The system consists of two main components:
- QGIS plugin: A QGIS plugin that creates a socket server within QGIS to receive and execute commands.
- MCP Server: A Python server that implements the Model Context Protocol and connects to the QGIS plugin.
Installation
Prerequisites
- QGIS 3.X (only tested on 3.22)
- Claude desktop
- Python 3.10 or newer
- uv package manager:
If you're on Mac, please install uv as
brew install uv
On Windows Powershell
powershell -ExecutionPolicy ByPass -c "irm https://astral.sh/uv/install.ps1 | iex"
Otherwise installation instructions are on their website: Install uv
⚠️ Do not proceed before installing UV
Download code
Download this repo to your computer. You can clone it with:
git clone git@github.com:jjsantos01/qgis_mcp.git
QGIS plugin
You need to copy the folder qgis_mcp_plugin and its content on your QGIS profile plugins folder.
You can get your profile folder in QGIS going to menu Settings -> User profiles -> Open active profile folder Then, go to Python/plugins and paste the folder qgis_mcp_plugin.
On a Windows machine the plugins folder is usually located at:
C:\Users\USER\AppData\Roaming\QGIS\QGIS3\profiles\default\python\plugins
and on MacOS: ~/Library/Application\ Support/QGIS/QGIS3/profiles/default/python/plugins
Then close QGIS and open it again. Go to the menu option Plugins > Installing and Managing Plugins, select the All tab and search for "QGIS MCP", then mark the QGIS MCP checkbox.
Claude for Desktop Integration
Go to Claude > Settings > Developer > Edit Config > claude_desktop_config.json to include the following:
If you can't find the "Developers tab" or the
claude_desktop_config.jsonlook at this documentation.
{
    "mcpServers": {
        "qgis": {
            "command": "uv",
            "args": [
                "--directory",
                "/ABSOLUTE/PATH/TO/PARENT/REPO/FOLDER/qgis_mcp/src/qgis_mcp",
                "run",
                "qgis_mcp_server.py"
            ]
        }

    }
}
Usage
Starting the Connection
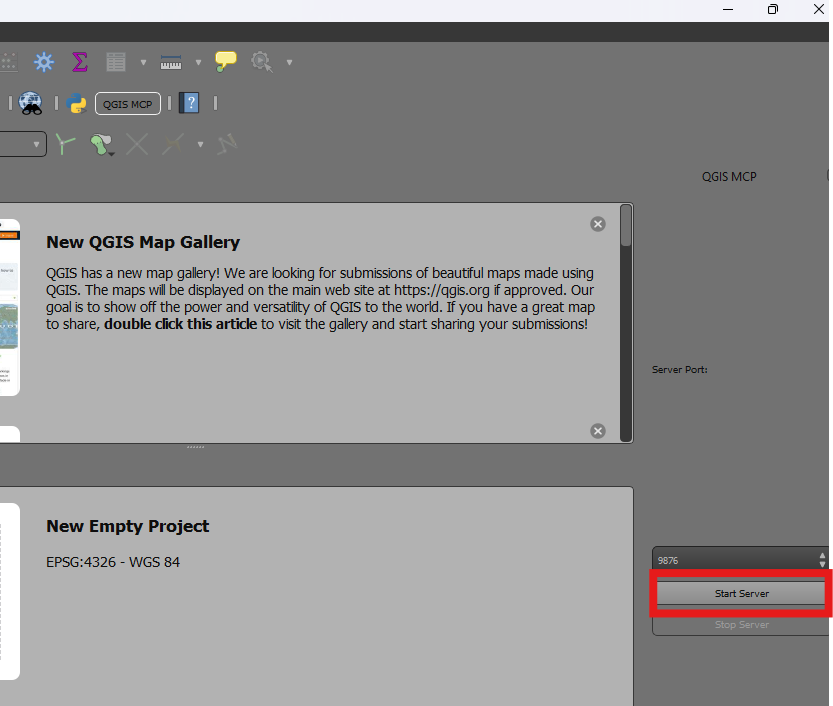
- In QGIS, go to
plugins>QGIS MCP>QGIS MCP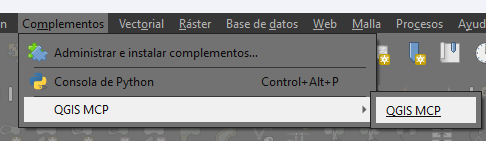
- Click "Start Server"
Using with Claude
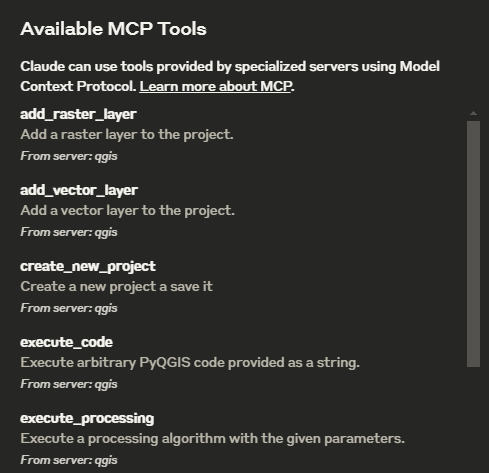
Once the config file has been set on Claude, and the server is running on QGIS, you will see a hammer icon with tools for the QGIS MCP.
Tools
ping- Simple ping command to check server connectivityget_qgis_info- Get QGIS information about the current installationload_project- Load a QGIS project from the specified pathcreate_new_project- Create a new project and save itget_project_info- Get current project informationadd_vector_layer- Add a vector layer to the projectadd_raster_layer- Add a raster layer to the projectget_layers- Retrieve all layers in the current projectremove_layer- Remove a layer from the project by its IDzoom_to_layer- Zoom to the extent of a specified layerget_layer_features- Retrieve features from a vector layer with an optional limitexecute_processing- Execute a processing algorithm with the given parameterssave_project- Save the current project to the given pathrender_map- Render the current map view to an image fileexecute_code- Execute arbitrary PyQGIS code provided as a string
Example Commands
This is the example I used for the demo:
You have access to the tools to work with QGIS. You will do the following:
	1. Ping to check the connection. If it works, continue with the following steps.
	2. Create a new project and save it at: "C:/Users/USER/GitHub/qgis_mcp/data/cdmx.qgz"
	3. Load the vector layer: ""C:/Users/USER/GitHub/qgis_mcp/data/cdmx/mgpc_2019.shp" and name it "Colonias".
	4. Load the raster layer: "C:/Users/USER/GitHub/qgis_mcp/data/09014.tif" and name it "BJ"
	5. Zoom to the "BJ" layer.
	6. Execute the centroid algorithm on the "Colonias" layer. Skip the geometry check. Save the output to "colonias_centroids.geojson".
	7. Execute code to create a choropleth map using the "POB2010" field in the "Colonias" layer. Use the quantile classification method with 5 classes and the Spectral color ramp.
	8. Render the map to "C:/Users/USER/GitHub/qgis_mcp/data/cdmx.png"
	9. Save the project.