
NerdPrompt
interwebologist/NerdPrompt
Chat IA formatado para terminal com cores, código destacado e threads
Ver no GitHubAgent de chat por terminal com formatação rica, cores ANSI customizáveis, syntax highlighting de código e suporte a threads. Integra com Perplexity.AI, ChatGPT e Claude, oferecendo múltiplos modos de prompt (padrão, conciso, comando) e modo raw para uso em pipelines de automação.
Instalação
npx convez-ai interwebologist/NerdPrompt1 comando no terminal: detecta o formato do repositório (marketplace ou plugin avulso) e instala via Claude Code. Requer Node 18+ e o Claude Code instalado.
Métricas
Casos de uso
- Integração com NeoVim para consultas rápidas durante desenvolvimento
- Automação de scripts CLI com modo raw para pipelines agentic
- Documentação interativa com syntax highlighting e follow-up questions
Veredito

Solução prática para devs que vivem no terminal, com bom suporte a customização visual e integração com editors. O modo raw o torna útil para automação, mas depende de estar familiarizado com linha de comando.
README
A tradução para o português deste README ainda está na fila.
🧠 NerdPrompt
🎬 Demo
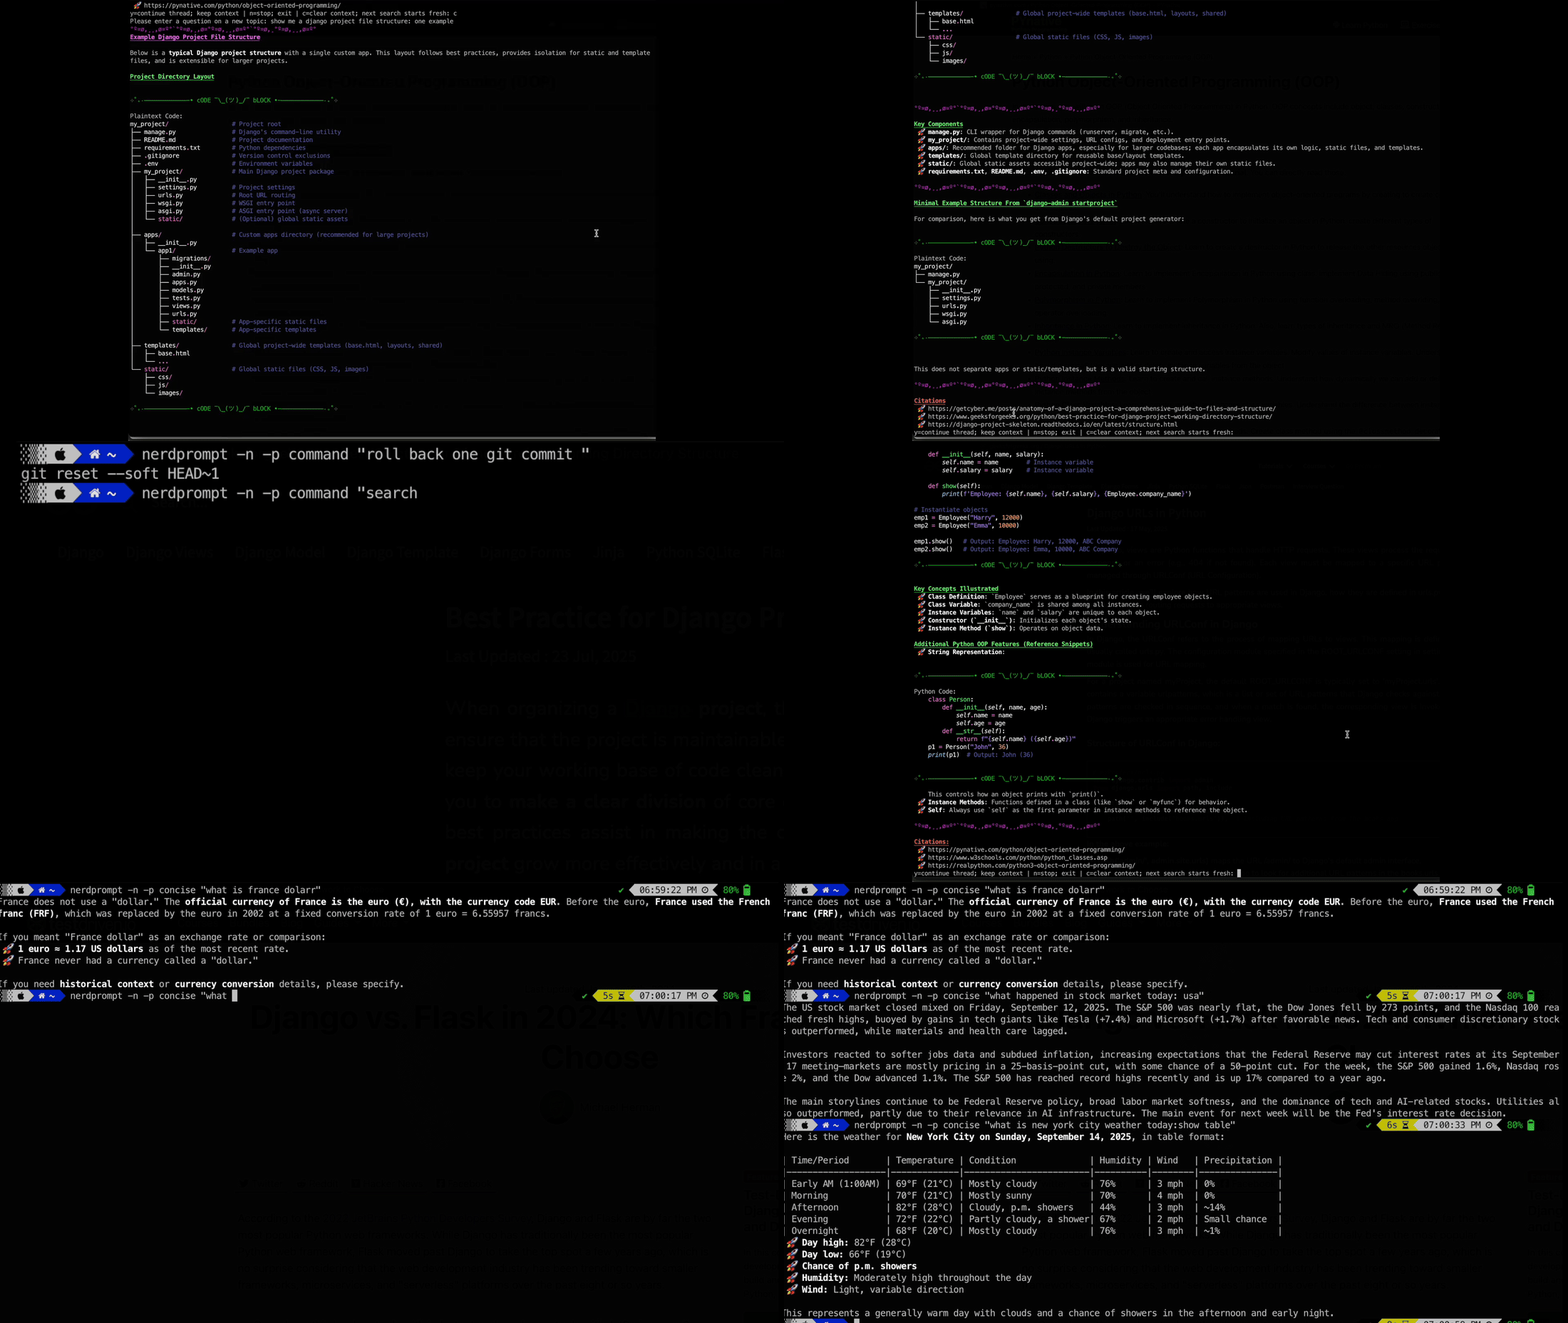
AI formatted for tricked out terminals now with customizable ANSI colors, emojis, ASCII art dividers, code detection and code syntax highlighting with follow up questions (threads) (Currently tested with Perplexity.AI, should work with ChatGPT, Claude, Cohere)
In the default mode NerdPrompt keeps context while asking follow up questions, but you can clear context to reset the thread topic and keep going.
Options:
-n/--nothread: Output the response end execution. Great for quick answers though its easy enough to keep a tmux pane with rolling execution where you clear for new questions or just continue the thread.-p/--prompt: 'default', 'concise', 'command', but you can set your own. Default system prompt focuses on colorful output, examples, for the computer professional. 'concise' prompt for shrinking answers to fewest tokens possible, and 'command' for only responding with the command you asked for.-m/--model: Overrides the LLM models setting set in config.yaml. Available models:sonar,sonar-pro,sonar-reasoning,sonar-research-pro,sonar-deep-researchif using Perplexity.AI. Check your OpenAPI provider for these values.-r/--raw: Output raw markdown without NerdPrompt additions - perfect for AI agents web searching tooling. Skips converting for terminal , so faster as well.--paste: Paste mode for multiline input - accepts piped content or interactive paste ('Enter' to skip line after pasted text and Ctrl+D to get response ). Piped input processes content then exits gracefully; interactive paste mode allows follow-up questions.
Screenshots
No-Thread Mode: Command-Only Response and Exit
NeoVim Integration
Set up with "leader key + np hotkey" HERE
With Noice installed, this provides a popup floating in the middle of the screen before splitting to run NerdPrompt.
🚀 Features
- Custom terminal styling: Emoji, ANSI colors, or ASCII-enhanced bullet points
- Flexible dividers: Horizontal dividers for content and code blocks
- Custom headers: Match your terminal/vim theme colors with underlines and styling
- Rich text formatting: Bold, italic, and combined formatting rendered in terminal
- Clean output: Removes citation markers like "[1]" for cleaner Perplexity.ai responses
- Syntax highlighting: 40+ Pygments themes for code blocks with custom dividers
- Multiple system prompts: Choose between 'default', 'concise', or 'command' modes, or create custom prompts in config.yaml
- Raw output mode: Perfect for AI agents and integration with other tools
🔧 Installation
Follow these steps to install Nerd Prompt:
-
Clone the repository:
git clone https://github.com/interwebologist/NerdPrompt.git cd NerdPrompt -
Create and activate a virtual environment (recommended):
python3 -m venv venv # On Linux or macOS: source venv/bin/activate # On Windows: venv\Scripts\activate -
Install dependencies:
pip install -r requirements.txt -
Set up your API key (see below).
Note:
Using a virtual environment (venv) keeps dependencies isolated from your system Python and is best practice for Python projects.
🔑 Setting Up Your API Key
To use Nerd Prompt, you need an API key from Perplexity.ai. Here's how to get it:
- Log in to Perplexity.ai: Visit www.perplexity.ai and log in to your account.
- Navigate to Settings: Click on the Settings icon (bottom-left corner).
- Access the API Tab: Select the API tab from the menu.
- Generate or Copy Your API Key: Click "Generate API Key" if you don't already have one, or copy your existing key.
- Save your API key securely.
🛠️ Configuring Your API Key
- Create a
.envfile in the project directory:
touch .env
- Add your API key to the
.envfile:
API_KEY=your_api_key_here
- The project will automatically load the key from the
.envfile when you run it.
🖥️ Usage Instructions
Basic Usage
Run the script with your query as an argument:
python nerdprompt.py "What is the capital of France?"
System Prompt Selection
Choose different response styles with the -p flag:
# Default prompt (detailed responses)
python nerdprompt.py "Explain Python decorators"

# Concise prompt (token-efficient responses)
python nerdprompt.py -p concise "Explain Python decorators"

# Custom prompt (add your own in config.yaml)
python nerdprompt.py -p custom "Tell me about the weather"
Model Selection
Override the default model from config.yaml:
python nerdprompt.py -m sonar-reasoning -p concise "Analyze the trade-offs of microservices"
Raw Output Mode
For AI agents or piping to other tools:
python nerdprompt.py --raw "What is Docker?"
python nerdprompt.py -p concise --raw "Explain APIs"
Paste Mode
For multiline input and code analysis - solves copy-paste repetition issues:
# Interactive paste mode - paste content and press Ctrl+D
python nerdprompt.py --paste

# Pipe files or code directly
cat script.py | python nerdprompt.py --paste
echo "def broken():
    x = 5
    if x > 3
        print('broken')" | python nerdprompt.py --paste

# Combine question with code using bash
(echo "What's wrong with this code?" && cat broken_script.py) | python nerdprompt.py --paste
echo -e "Optimize this function:\n$(cat my_code.py)" | python nerdprompt.py --paste
Pro Tip: Create a bash function for easy code analysis:
# Add to your ~/.bashrc or ~/.zshrc
analyze() {
    (echo "$1" && cat "${@:2}") | nerdprompt --paste --nothread
}

# Usage examples:
analyze "What's wrong with this code?" broken_script.py
analyze "Optimize this function" my_code.py
analyze "Add error handling to:" api_client.py
Use Case: Eliminates the issue where copying/pasting multiline content causes the same query to run multiple times.
No Thread Mode
Exit after showing response without threading capability:
# No threading - returns only the answer and exits
python nerdprompt.py --nothread "What is Python?"
python nerdprompt.py -n "Explain machine learning"

# Command-only responses (perfect for getting specific commands)
python nerdprompt.py -p command -n "roll back git commit 1 commit"
python nerdprompt.py -p command --nothread "list all docker containers"
Pro Tip: Set up an alias to run commands without activating the Python environment:
# Add to your ~/.bashrc or ~/.zshrc
alias nerdprompt="/path/to/your/NerdPrompt/venv/bin/python /path/to/your/NerdPrompt/nerdprompt.py"

# Usage examples:
nerdprompt "What is Docker?"
nerdprompt -p concise "Explain APIs"
nerdprompt -p command -n "list all running processes"
✨ Markdown Formatting in Terminal
The tool supports formatting for the Terminal:
- Headers are styled with different colors. Example:
- Green for
# Header - Blue for
## Subheader - Red for
### Sub-subheader
- Green for
- Text styling includes:
- Bold
- Italic
- Bold Italic
- Emoji-enhanced bullet points like 🚀, 🔥, and ✨ add personality to your terminal output.
- Add your own ASCII art dividers or dividers with emoji's
💡 Best Practices
- Security: Keep your API key private and never share it publicly
- Credits: Ensure sufficient credits in your Perplexity.ai account (Pro users receive $5/month free credits at time of writing)
- Compatibility: Requires Python 3.8 or higher
- Performance: Use virtual environments to isolate dependencies
❓ Troubleshooting
If you encounter issues:
- API Key Issues: Ensure your
.envfile contains a valid API key - Dependencies: Verify all dependencies are installed (
pip install -r requirements.txt) - Account Status: Check your Perplexity.ai account for sufficient credits and active API keys
- Python Version: Confirm you're using Python 3.8 or higher
- Virtual Environment: Make sure your virtual environment is activated
For additional support, consult Perplexity's Help Center.
🎨 Code Syntax Highlighting Themes
This project uses Pygments for code syntax highlighting. You can customize the appearance of code blocks by selecting one of the many available Pygments styles. For a live preview of each theme, visit the Pygments demo page.
To set a style, configure your formatter in the config.yaml with the desired style name.
For example, in Python:
Available Code Styles
Below is a list of supported syntax highlighting themes:
- abap
- algol
- algol_nu
- arduino
- autumn
- bw
- borland
- coffee
- colorful
- default
- dracula
- emacs
- friendly_grayscale
- friendly
- fruity
- github-dark
- gruvbox-dark
- gruvbox-light
- igor
- inkpot
- lightbulb
- lilypond
- lovelace
- manni
- material
- monokai
- murphy
- native
- nord-darker
- nord
- one-dark
- paraiso-dark
- paraiso-light
- pastie
- perldoc
- rainbow_dash
- rrt
- sas
- solarized-dark
- solarized-light
- staroffice
- stata-dark
- stata-light
- tango
- trac
- vim
- vs
- xcode
- zenburn
Enjoy using Nerd Prompt! 🚀