
micrOSMCP
BxNxM/micrOSMCP
Servidor MCP e UI para gerenciar e testar dispositivos micrOS
Ver no GitHubServidor MCP em TypeScript para descobrir, inspecionar e comandar dispositivos micrOS. Inclui interface web de teste que lista ferramentas, renderiza schemas como formulários e permite executar pipelines de comandos em dispositivos selecionados.
Instalação
npx convez-ai BxNxM/micrOSMCP1 comando no terminal: detecta o formato do repositório (marketplace ou plugin avulso) e instala via Claude Code. Requer Node 18+ e o Claude Code instalado.
Métricas
Casos de uso
- Descoberta e mapeamento de dispositivos micrOS em rede
- Inspeção de cache de dispositivos e comandos disponíveis
- Execução remota de comandos e pipelines em dispositivos
- Testes e validação de integração com micrOS via MCP
Veredito

Ferramenta especializada para quem trabalha com o ecossistema micrOS. Bem estruturada em TypeScript com UI funcional para testes, mas exige familiaridade com MCP servers e dispositivos micrOS para aproveitar plenamente.
README
A tradução para o português deste README ainda está na fila.

micrOSMCP
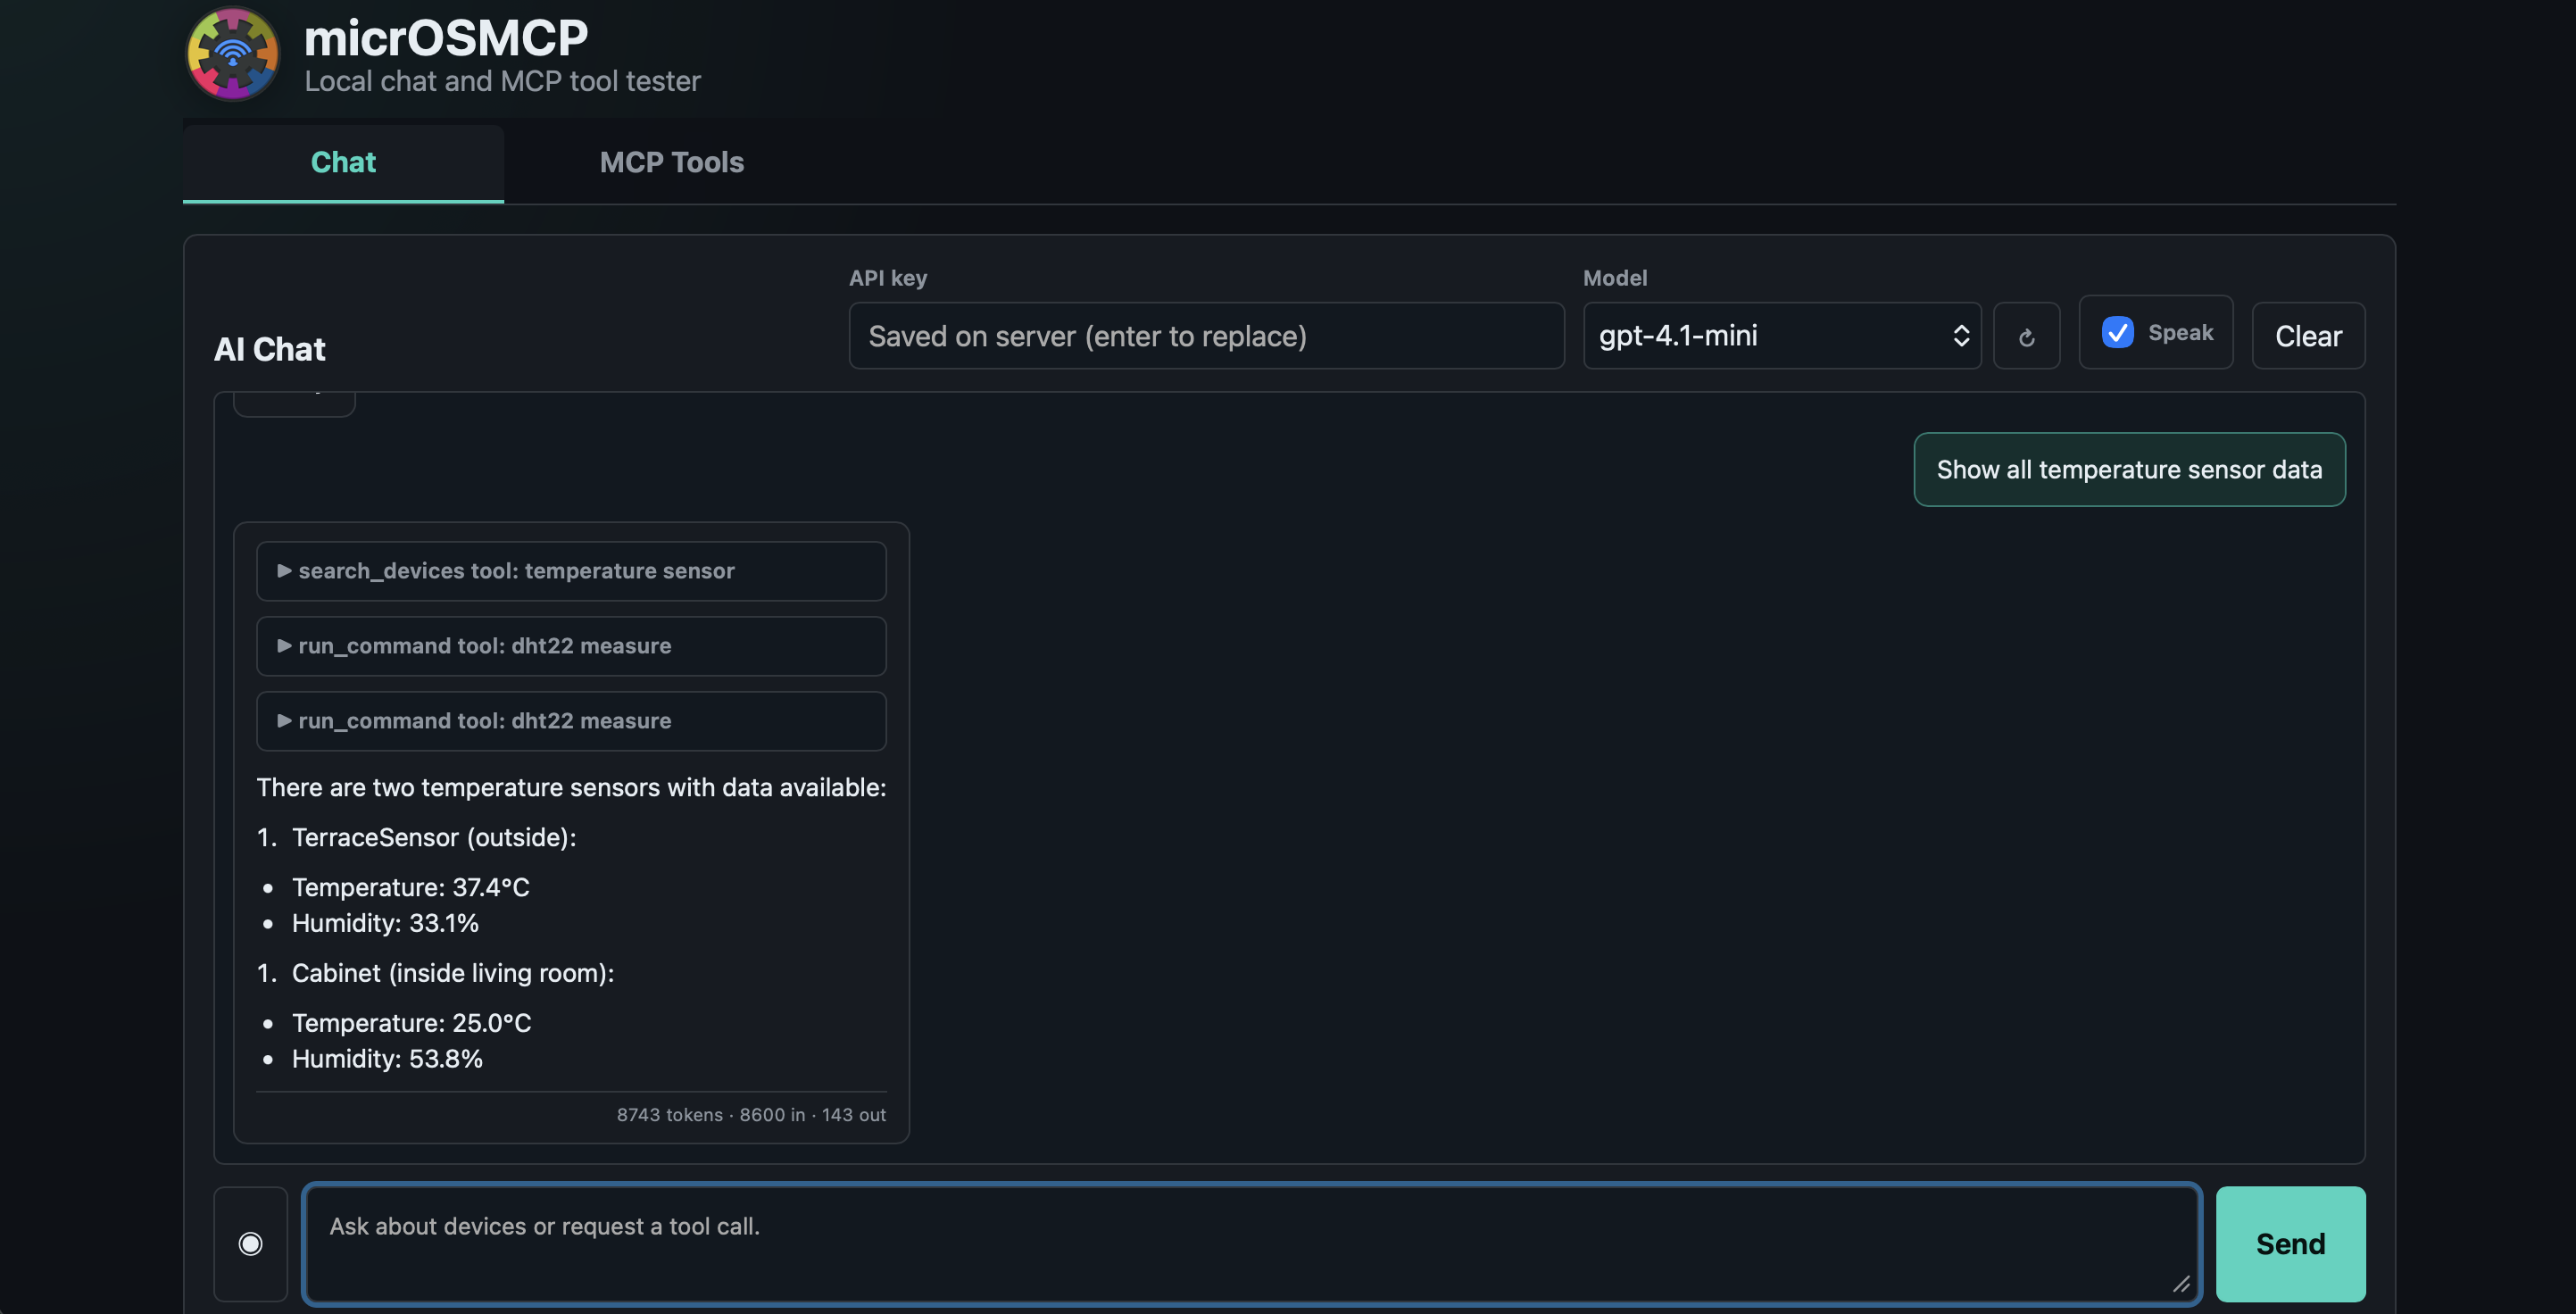
Standalone TypeScript MCP server and browser tester UI for micrOS devices. Use it to discover devices, inspect the device cache, run micrOS commands, and discover each device's available module commands.
Quick Start
npm install
npm run build
npm run start:ui
Open the printed URL, usually:
http://127.0.0.1:3333
The UI is the easiest way to verify everything locally. It lists the MCP tools, renders their schemas as forms, keeps JSON arguments editable, and gives device dropdowns for device-targeted tools.
Use With An MCP Client
Build first:
npm install
npm run build
Codex-style config.toml:
[mcp_servers.microsmcp]
command = "npm"
args = ["run", "--silent", "start"]
cwd = "/Users/bnm/Development/micrOSMCP"
Generic JSON-style MCP config:
{
  "mcpServers": {
    "microsmcp": {
      "command": "npm",
      "args": ["run", "--silent", "start"],
      "cwd": "/Users/bnm/Development/micrOSMCP"
    }
  }
}
Use --silent with npm in MCP client config so npm does not print lifecycle banners to stdout before the MCP protocol starts. The direct equivalent is:
{
  "mcpServers": {
    "microsmcp": {
      "command": "node",
      "args": ["/Users/bnm/Development/micrOSMCP/scripts/start.mjs", "mcp"],
      "cwd": "/Users/bnm/Development/micrOSMCP"
    }
  }
}
Commands
npm run help                  # Show start modes and environment variables
npm run build                 # Compile TypeScript into dist/
npm run start                 # Start stdio MCP server from dist/
npm run start:test            # Build and run minimal MCP/tool contract tests
npm run start -- ui           # Start UI from dist/ without rebuilding
npm run start:mcp             # Explicit stdio MCP mode
npm run start:ui              # Build, then start the browser tester UI
npm run docker:build          # Build and export Docker image tar
Forwarded start help:
npm run start -- --help
Useful environment variables:
MICROS_DEVICE_CACHE_PATH=/path/to/device_conn_cache.json npm run start
HOST=0.0.0.0 PORT=3333 npm run start -- ui
Tools
The MCP server exposes five tools.
| Tool | Purpose |
|---|---|
list_devices | Return cached micrOS devices. |
filter_devices | Filter cached devices by UID, FUID, IP, port, and optional live status. |
discover_devices | Scan a /24 network, handshake with micrOS devices, and update the cache. |
run_command | Run a command or command pipeline on one selected device. |
discover_commands | Run modules, then <module> help, to map a device's command surface. |
run_command
String pipeline using the micrOS <a> separator:
{
  "deviceTag": "TinyDevBoard",
  "command": "version<a>conf webui"
}
Array pipeline:
{
  "deviceTag": "TinyDevBoard",
  "command": ["version", "conf webui"]
}
Use read-only commands such as version for smoke tests. Other micrOS commands may change device state.
discover_devices
{
  "networkPrefix": "10.0.1",
  "startHost": 2,
  "endHost": 254,
  "port": 9008,
  "timeoutMs": 1000,
  "concurrency": 50
}
If networkPrefix is omitted, the server uses the active local IPv4 interface. In Docker Desktop, pass networkPrefix explicitly when automatic discovery sees the container network instead of your LAN.
discover_commands
All cached devices:
{}
One device by UID, FUID, IP, or partial device name:
{
  "deviceTag": "TinyDevBoard"
}
The response includes per-module raw help plus a flattened commands list:
{
  "module": "gameOfLife",
  "function": "load",
  "parameters": ["w=32", "h=16", "custom=None"],
  "command": "gameOfLife load w=32 h=16 custom=None",
  "signature": "load w=32 h=16 custom=None"
}
Use password if the device requires micrOS app authentication.
How Tools Are Defined
Each MCP tool is defined in one file under src/tools/. That file owns both:
- the business function, such as
runCommand(...) - the MCP definition object, such as
runCommandTool
That keeps the tool name, title, description, Zod input schema, and behavior together. src/mcp-tools.ts only registers the collected definitions and formats MCP responses. src/tools.ts is the public barrel for tool functions, tool definitions, and shared types.
The rough call path is:
MCP client
  -> src/index.ts
  -> registerMicrOSTools() in src/mcp-tools.ts
  -> toolDefinitions from src/tools/registry.ts
  -> focused definition + implementation in src/tools/<tool-name>.ts
  -> shared micrOS helpers in src/tools/common.ts when needed
Add A New Tool
- Create a focused tool file under
src/tools/, for examplesrc/tools/reboot-device.ts. - Define the tool input type in that same file. Put types in
src/tools/common.tsonly when they are genuinely shared helper types. - In the same file, export the business function and a
MicrOSToolDefinition. - Add the
*Tooldefinition tosrc/tools/registry.ts. - Export the function and definition from
src/tools.ts. - Add a short README entry in the tool table or tool examples.
- Run
npm run start:testfor focused contract tests and project entrypoint checks.
Implementation example:
// src/tools/example-tool.ts
import { z } from "zod";
import { cacheToDevices, readDeviceCache } from "./common.js";
import { defineTool } from "./definition.js";

export type ExampleToolInput = {
  query?: string;
};

export async function exampleTool(input: ExampleToolInput = {}) {
  const cache = await readDeviceCache();
  const devices = cacheToDevices(cache);

  return {
    query: input.query ?? null,
    count: devices.length,
    devices
  };
}

export const exampleToolDefinition = defineTool<ExampleToolInput>({
  name: "example_tool",
  title: "Example Tool",
  description: "Describe what the tool does for MCP clients and humans.",
  inputSchema: {
    query: z.string().optional().describe("Optional filter text.")
  },
  handler: exampleTool
});
Registry export:
// src/tools/registry.ts
import { exampleToolDefinition } from "./example-tool.js";

export const toolDefinitions = [
  // existing tools...
  exampleToolDefinition
];
Barrel export:
// src/tools.ts
export type { ExampleToolInput } from "./tools/example-tool.js";
export { exampleTool, exampleToolDefinition } from "./tools/example-tool.js";
Tool responses should be JSON-serializable objects. If a tool can fail in a controlled way, prefer returning { ok: false, error: "..." }; the generic registrar in src/mcp-tools.ts marks those responses as MCP errors when appropriate.
Device Cache
Default cache path:
data/device_conn_cache.json
Cache format:
{
  "device_uid": ["ip-address", 9008, "device-fuid"]
}
If the cache is missing or invalid, the server creates it with these defaults:
__devuid__:192.168.4.1, port9008, FUID__device_on_AP____localhost__:127.0.0.1, port9008, FUID__simulator__
The first cache read also attempts one automatic discovery and continues with whatever cache is available. Discovery is additive: it updates discovered devices but does not delete stale cached entries.
Docker
Build and export a standalone image:
npm run docker:build
Defaults:
image: microsmcp:latest
export: dist/microsmcp-docker-image.tar.gz
Customize:
npm run docker:build -- --image microsmcp:dev
npm run docker:build -- --output dist/microsmcp.tar
npm run docker:build -- --image microsmcp:dev --output dist/microsmcp-dev-docker-image.tar.gz
npm run docker:build -- --no-export
Install an exported image on another machine:
docker load -i dist/microsmcp-docker-image.tar.gz
Run as stdio MCP:
docker run --rm -i microsmcp:latest mcp
Run the tester UI endpoint:
docker run --rm -p 3333:3333 microsmcp:latest ui
Persist the device cache:
docker volume create microsmcp-data
docker run --rm -i -v microsmcp-data:/app/data microsmcp:latest mcp
docker run --rm -p 3333:3333 -v microsmcp-data:/app/data microsmcp:latest ui
Docker network notes:
- Direct commands to cached device IPs usually work if the container can route to your LAN.
- Automatic
/24discovery uses the container's network interface by default. - On Linux,
--network hostgives the container the host network view. - On Docker Desktop, pass
networkPrefixexplicitly todiscover_deviceswhen needed. - The UI binds to
0.0.0.0:3333inside Docker, so-p 3333:3333exposes it on the host.
Docker MCP client config:
{
  "mcpServers": {
    "microsmcp": {
      "command": "docker",
      "args": ["run", "--rm", "-i", "microsmcp:latest", "mcp"]
    }
  }
}
Architecture
MCP means Model Context Protocol. It lets a client application start this server, list available tools, and call them with structured JSON arguments.
For this project, MCP is the adapter layer between a client and micrOS devices:
MCP client -> stdio -> micrOSMCP -> TCP socket -> micrOS device
The implementation mirrors the useful behavior of micrOS socketClient.py and micrOSClient.py, but it is standalone TypeScript and does not call Python.
Project structure:
src/index.ts: minimal MCP stdio bootstrap.src/mcp-tools.ts: generic MCP registrar and response formatter.src/tools.ts: collection barrel that re-exports tool implementations, definitions, and shared types.src/tools/: individual tool files; each owns its schema, description, and business logic.src/tools/registry.ts: ordered list of tool definitions to register.src/tools/definition.ts: sharedMicrOSToolDefinitiontype.src/tools/common.ts: shared device cache, socket client, discovery, parsing, and concurrency helpers.src/ui.ts: local HTTP server for the browser tester UI.public/: browser UI files for calling MCP tools without an AI client.scripts/start.mjs: mode-aware starter for compiled MCP or UI entrypoints.scripts/docker-build.mjs: Docker build and image export helper.scripts/test.mjs: minimal contract tests and project entrypoint checks.Dockerfile: minimal runtime image for stdio MCP or the tester UI endpoint.data/device_conn_cache.json: project-local micrOS device cache, created at runtime when needed.
Runtime flow:
- MCP client calls a tool, for example
run_command. src/index.tsstarts the MCP server and registers tools throughsrc/mcp-tools.ts.src/mcp-tools.tsregisters the collected definitions fromsrc/tools/registry.ts.- The matching file under
src/tools/owns the Zod schema, reads the cache, selects a device, opens a TCP socket if needed, and performs the micrOS operation. - The result is serialized as formatted JSON text and returned to the MCP client.
To add another tool, create a focused file under src/tools/, export its function and definition from src/tools.ts, then add its definition to src/tools/registry.ts. Shared micrOS behavior should stay in src/tools/common.ts only when it is useful to more than one tool.
Requirements
- Node.js 20 or newer.
- Network access from the host or container to micrOS devices on TCP port
9008. - Docker, only if you want to build or run the container image.